Showing posts with label MFT. Show all posts

Wednesday, October 21, 2020

Stacey Yacula Halloween!

Hello,
Today, I'm sharing a cute little card featuring some Halloween images from Stacey Yacula.  This card combines sets from My Favorite Things and Purple Onion Designs.  I love that even though she designs for 2 different companies, her images seamlessly work together.  For this card, I started with a piece of white card stock.  I stamped out my background images, masked them off, and used Distress Inks and Copics to color in the background.  Then I removed the masks and finished coloring the images.  Then I colored up my focal images, fussy cut them out, and popped them onto my scene using foam tape.  Some added highlights with a white gel pen finish it off.  Have I mentioned how much I love Halloween? lol!


Card Details:

Saturday, July 18, 2020

Paperie Ink Llama Say

Hello, hello!  I hope you are having a great weekend.  Today, I'm excited to share a couple of cards I created using the adorable Llama Say stamp set from Paperie Ink.  As soon as this company made it's debut, I fell in love.  They have the cutest stamps!  And I knew I wanted to create some sweet little cards with them.  

For both cards, I used some distress inks in my stash to create my sunset background.  Then I die cut the landscape using the Southwest Border Die from Craftin' Desert Divas.  I colored up my little llamas and Cactus images using Copic Markers and fussy cut them out.  Then I popped them onto my scenes using foam tape.  I just love how these came out.  So much fun!


Card Details:
Craftin Desert Divas Southwest Border Die
MFT Diagonal Stitched Rectangle Dies

Saturday, June 27, 2020

Not 2 Shabby Shop Farmer's Market Digi

Hi!  Today, I'm sharing a sweet little Farmer's Market Card using the NEW Digi set from Not2ShabbyShop!  You can find the new set HERE!  For my card, I started with some chicken wire patterned paper and trimmed it to fit my card base.  Then I printed out my Farmer's Market Digi Stamp and Colored it up with Copics.  I fussy cut it out and adhered it to the center of my card panel.  Then I added some die cut grass to the bottom and this cute little girl from MFT.  A super easy card that makes a big statement!  


Card Details: 
MFT Green Pastures Stamp (Retired)
m

Wednesday, June 17, 2020

MFT Tweet Friends

Hello there!  Hope you are having a great week!  Today, I have a fun little card to share featuring the Stacey Yacula set from MFT called Tweet Friends.  This little set is one of my all time favorites.  These little birds are just the cutest!  To create this card, I started with the Pathway Background stamp from Hello Bluebird.  I'm telling you guys.  This stamp is awesome!!! It goes with just about everything.  I colored up the scene with my Copics.  Then I stamped out my little birds, colored those up and cut them out using the coordinating dies.  Then I used foam tape to add them to my scene.  I also stamped out my sentiment and some musical notes.  And that's it!  Easy peasy!  

Thanks so much for stopping by!  Have a great day!


Card Details:


Saturday, June 13, 2020

Hi Sunshine

Hello, I have a fun little summer card for your today.  I used products from several different companies to create this one.  First I started with the MFT Distressed Patterns Stamp set and stamped out some ink splatters on the corners of my card.  Then I stamped my Sunshine sentiments from the Ellen Hutson All Inside Stamp Set.  I cut up some nautical themed patterned papers and layered them on top of each other.  Then I added a die cut port hole and the word "hey" die cut from red card stock.  I colored up my image from MFT and added her to the left corner using foam tape.  Then I added a few enamel dots, some die cut clouds, and there you have it, one bright, summery card!  


Card Details:
MFT Let's Get Nautical Die Set
Ellen Hutson All Inside Clear Stamp


Thursday, April 9, 2020

Avery Elle Peek-A-Boo Scary Pals - Make a Wish

Hello!  I'm back today with another favorite set of mine!  These adorable little monsters are part of the Avery Elle Peek-A-Boo Scary Pals Set!  Aren't they just the cutest???  For my card, I started with a sun stencil and created some rays with distress inks.  Then I die cut a circle out of yellow card stock and added that to the middle of my rays.  Then I layered in tons of die cut trees and a winding road.  Then I stamped out my little images and colored them up using Copic Markers.  I die cut them out and started layering them all together.  I just love that they fit inside this little car.  So much fun!  Most of the pieces are popped up with foam tape to add dimension and interest to the card.  To finish it all off, I stamped my sentiment at the top and added a few highlights with my white gel pen! 


Card Details:
My Favorite Things Open Road Dienamics
My Favorite Things Sun Ray Stencil


Monday, December 9, 2019

Sugarpea Designs Hey Winter

Hello!  Just wanted to pop on and share this fun little holiday card I made using the NEW Hey Winter Clear Stamp set from Sugarpea Designs.  I have to tell you, I absolutely LOVE this set!  The minute I saw it, I had to snatch it up, and I'm so glad I got a chance to create with it before the end of the season!  For my card, I started with some woodgrain patterned paer.  Then I layered on a strip of red buffalo plaid across the bottom.  I also added a white die cut scallop for a little interest.  I die cut the "warm wishes" sentiment from white foam and layered a piece of white cardstock on top.  Then I adhered that to my card panel.  I stamped out this cute little bear, added the sweater elements, and colored him up with my Copics.  I used the coordinating die to cut him out and adhered him to the panel.  To finish it all off, I scattered several die cut snowflakes around the card.  Such a simple design, but I really like how it turned out!  


Thanks so much for stopping by! Have a great day!

Card Details:
Reverse Confetti Double Edge Wonky Scallop Die
MFT Stylish Snowflakes Die


Saturday, July 6, 2019

Avery Elle Peek-a-Boo Scary Pals

Hello!  I'm so excited to share this very fun and very whimsical card using the NEW Peek-A-Boo Scary Pals from Avery Elle!  For my card, I used some patterned paper and layered it together for my background panel.  Then I used a retired polaroid frame die from My Favorite Things to cute a white photo frame.  I mounted that on fun foam to give it some dimension and built my scene within the opening.  I used various dies to create this city-scape and then added my monsters and car in front of that with some foam tape.  I added my sentiment to the bottom right hand corner and finished the card with some balloons in various colors.  


here's a look at the inside:


Card Details:
Avery Elle Peek-A-Boo Scary Pals Clear Stamp: https://www.averyelle.com/peek-a-boo-scary-pals-clear-stamps/
Avery Elle Peek-A-Boo Car Clear Stamp: https://www.averyelle.com/peek-a-boo-car-clear-stamps/
Avery Elle Peek Car Elle-ments Die: https://www.averyelle.com/die-peek-a-boo-car-elle-ments/
Taylored Expressions Starry Night Cutting Plate: https://www.tayloredexpressions.com/dies/starry-night-cutting-plate.html


Friday, May 10, 2019

Hello Bluebird Wild About You!

Hello!  Today, I wanted to share a sweet little card I made with the Hello Bluebird Jungle Littles Stamp Set.  This sweet little set includes some adorable animals, sentiments, and jungle foliage!  For my card, I used some patterned papers to create the background of my card.  Then I colored up these cuties, cut them out on my Scan N Cut 2, and popped them on top of this little rectangle frame.  I added in some die cut foliage as well as the little vine for the monkey.  Then I stamped out my sentiment and added that as well.  This card was pretty simple to put together, but I just love how it turned out!  So cute!  


here's a look at the inside: 


Card Details:
MFT Leafy Greenery Dienamics
Doodlebug At The Zoo 6x6 Patterned Paper

Thanks so much for stopping by!  Hope you have a great day!

Wednesday, May 8, 2019

Hello Bluebird Pig Day

Hello!  I just wanted to stop by and share a fun little card I made using the Hello Bluebird Pig Day stamp set.  I absolutely love this company and these little pigs are just the cutest!!!  For my card, I created my background using the MFT Cloud Stencil.  I added some grass at the bottom with a die from my stash and cut the whole thing out using the X-Stitched Rectangle dies from Gina Marie Designs.  Then I die cut the word "SMILE" using fun foam and layered some pretty yellow paper over the top.  I added that to the center of my card and popped on these cute little pigs and chicks with foam tape.  I just love how this turned out, the perfect card for any occasion!  


Here's a look at the inside:


Card Details:

Thanks so much for stopping by!  Have a great day!

Tuesday, April 17, 2018

Crafty Doodle Chick - MFT Rain or Shine

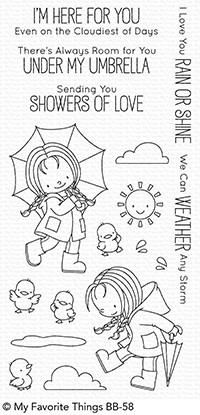
Hello!  Today, I'm sharing a fun card with the New MFT Rain or Shine stamp set.  This adorable set and others can be found in the Crafty Doodle Chick Shop here! 


https://craftydoodlechick.com/collections/mft/products/bb-rain-or-shine-stamp-set-mft


For my card, I decided to create a rainy scene.  I chose some "rain" themed patterned papers, colored my images to match, and fussy cut them out.  Then I die cut some green bushes, and a grey sidewalk out of solid cardstock.  I layered those on top of some rain-drop patterned papers and popped my images on top with some foam tape.  Then I stamped my sentiment on a die cut cloud and added it to the sky with a few other clouds.  A strip of die cut grass and a kite die cut finish the card off, creating a fun little rainy scene. 
 
Here's a look at the inside:

 
Thanks so much for stopping by!  Have a great day!!!
 

Tuesday, March 13, 2018

Crafty Doodle Chick- MFT Viking

Hello!  Today, I'm sharing a fun card using My Favorite Things Viking Stamp.  I have been dying to use this stamp since it came out, but it keeps selling out!  lol!  Well, now it is finally back in the Crafty Doodle Chick shop so I have create a fun little card to share with you guys! 


https://craftydoodlechick.com/collections/mft/products/bb-viking-mft

For my card, I chose some fun Viking papers and colored my image to match using Copic Markers.  Then, I cut him out using my Scan N Cut 2.  I layered several of the papers together, added a match ship die cut and popped my image on top using some foam tape.  Then I stamped my sentiment on the flag and there you have it! 

 
a look at the inside:


Be sure to hop over to the Crafty Doodle Chick Shop and scoop up this little cutie before he's sold out again!  You can find him and many others in the shop.  Thanks so much for stopping by and have a great day! 

Tuesday, January 16, 2018

Crafty Doodle Chick - MFT You're Super ON SALE!

Hello!  Today I'm here posting my first ever card for Crafty Doodle Chick!  If you haven't stopped over there yet, be sure you check them out!  They offer a variety of stamps, dies, and papers for all your crafting needs! 

Today, I'm sharing a sweet little card using the oh-so-fun My Favorite Things You're Super Stamp Set.  It's ON SALE today so be sure to head over to the shop and snatch it up! 

https://craftydoodlechick.com/collections/mft/products/mft-bb-youre-super
 
I just love this set because it offers so many possibilities!  There are a ton of great sentiments and even a cityscape stamp to make backgrounds with! 
 
For my card, I chose some fun and bright patterned papers, colored my image to match, and cut it out using my Scan N Cut 2.  Then I layered up some of the papers, created a fun city background with the buildings stamp, and popped my image on top with some foam tape.  A fun little die cut sentiment and some enamel dots finish it off. 
 
 
a look at the inside:


Thank you so much for stopping by!  Be sure to head over THE SHOP to check out this set and others!

Thursday, December 1, 2016

I'm Back on the MFT Blog Today!

Hello!  I'm back on the My Favorite Things Blog today sharing 3 more creations!  I had so much fun guest designing for MFT and I can't thank them enough for the opportunity.  Be sure to pop over there and check out all the details! 

http://www.mftstamps.com/blog/a-trio-of-holiday-fun-from-larisa/


http://www.mftstamps.com/blog/a-trio-of-holiday-fun-from-larisa/


http://www.mftstamps.com/blog/a-trio-of-holiday-fun-from-larisa/

Thanks so much for stopping by! 

Wednesday, November 30, 2016

I'm Guest Designing on the MFT Blog!!!

Guess What!!!! I'm on the My Favorite Things blog today as a guest designer!!!! I'm so excited!  I just want to say a huge "Thank You" to MFT for the opportunity!  I had so much fun working with some of the new stamps and dies as well as some oldies-but-goodies!  Be sure to check out the post HERE for all the details about these cards and stay tuned tomorrow because I'll be back sharing 3 more cards!!! 
 
 
http://www.mftstamps.com/blog/sweet-woodsy-designs-with-larisa/


http://www.mftstamps.com/blog/sweet-woodsy-designs-with-larisa/

Thursday, September 29, 2016

I won! I won! MFT Superstar Contest

I can't believe it!  My card was chosen as one of the top ten for the MFT (My Favorite Things) 2016 Card Design Superstar Contest!  I'm so honored and excited.  Honestly, I think I'm still in shock!  You can see my card and all the other fabulous winners on the MFT blog HERE.  So so happy! 


Thanks so much for stopping by! 
 

Monday, September 19, 2016

MFT Card Design Superstar Contest (The Whole Herd)

Hello!  Hope you are having a wonderful Monday!  Today, I'm here sharing a card I made for the My Favorite Things Card Design Superstar Contest!  Be sure to hop over there and check out all the fabulous creations that have already been submitted!  So many gorgeous cards!!!  If you're interested in throwing your hat into the ring, there's still time!  The contest ends this Thursday! 
 
For my card, I knew I wanted to create something over-the-top, but I just couldn't decide which stamp set to use.  There are so many fabulous choices and I certainly own my fair share of MFT stamps and dies.  So, as I was flipping through my choices, I got the idea to use all of them!  Ok, not really, because I own way more MFT stamps than what you see here, but I did decide to create a little group photo featuring MFT characters from today and years passed.  First I chose a few to stamp and then I masked those off and stamped some more.  Then I masked those off and stamped some more.  What you see here is the result.  A fun little group photo!  I colored the images up with Copic markers, added a couple of tags from the Blueprints 1 Dienamics set and stamped my sentiment in the top left-hand corner.  The sentiment is from the You Gnome Me set. 
 
 
Here's a side view:
 
 
For the inside of the card, I stamped the little cow from the Whole Herd set and used the sentiment from that set as well.  I masked off the Happy Birthday part and just used the bottom portion.  It seemed fitting given the theme of the card. 
 
 
You can find all the sets I used below along with the Copic colors I used to color this scene.  Thank you so much for stopping by and wish me luck! 
 
Card Details:
MFT Blueprints 1 Dienamics
Patterned Paper - Doodlebug
Enamel Dots- The Paper Studio
Stickles - Frosted Lace
Stamp Sets:
MFT You Gnome Me
MFT Green Pastures
MFT Cute Critters
MFT Recipe for Happiness
MFT Magical Dragons
MFT Let's Hang Out
MFT Whole Herd
MFT Baseball Boy
MFT Genie
MFT Sweet As Can Bee
Copic Colors:
E15, E47,E42, E40, E33, E31, E55, E50, E53, E87, E00, E21, E13, E35, E18, E17, E57, E44, E49, E11, E04, E000, E08, R35, E37, E59, W3, W1, YG97, YG67, YG21, YG23, C0, C1, C3, C5, C7, C9, B21, B26, B24, 29, BG10, BG02, BG75, BG000, R20, R22, R30, R32, RV21, RV000, RV23, RV14, Y13, Y23, Y26, Y28, YR15, YR14, YR27, V12, V04, V15, V17, V06


Wednesday, July 13, 2016

Little Gnome

 
Hello!  Just wanted to share a simple little card I made using the MFT You Gnome Me set.  I've actually had this set for quite some time, but just hadn't used it.  I love gnomes so when I saw this set, I just knew I had to HAVE it!  It's just so darn cute! 
 
 
I wanted to keep my card pretty simple so I chose some cute garden paper, colored my little gnome to match, and added some little flags. 


Thanks so much for stopping by!
 
Card Details:
Patterned Paper- MME Gnome Sweet Gnome
Reverse Confetti Stitched Flag Trio
Stampin Up Banner Punch
MFT First Place Ribbon Die
Stampin Up Real Red Ink
Copic Colors- (skin) E000, E00, E04, E21, E11, R20 (hair) W0, W1, W3, W5 (image) RV10, RV11, RV34, YG95, YG97, G29, R24, R27, R59, YR21, Y26, B0000, B00, BG02