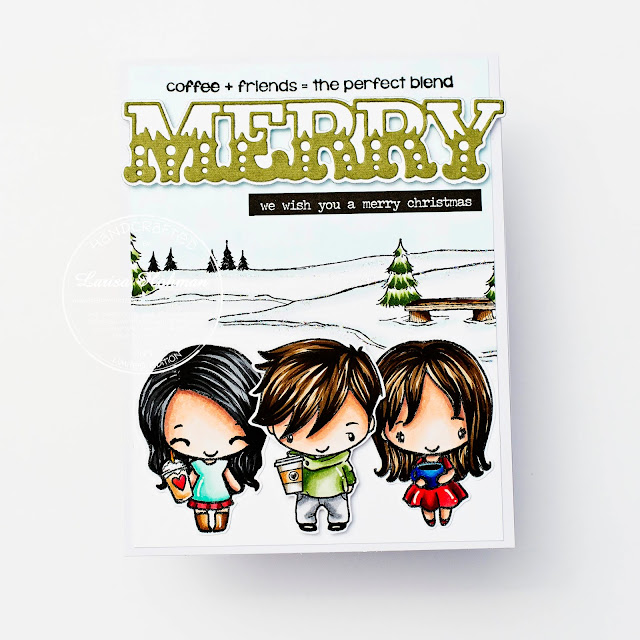
Hello! Hope your week is going well! Today, I'm back sharing another fun card from The Greeting Farm. These little cuties are from the Mini-Remix Brewtiful Clear Stamp Set. Aren't they adorable??? For my I card, I decided to create a little snowy scene. I stamped my background using from Purple Onion Designs. I colored it up with Copics, trimmed it to fit my card base, and added my title across the top. Then I stamped out my little images, colored them up with Copics, fussy cut them out, and popped them on with foam tape. Such a quick and simple card, but I love how it turned out!
Tuesday, September 29, 2020
The Greeting Farm Mini-Remix Brewtiful
Monday, September 28, 2020
La-La Land Crafts New Release
Hello! I'm back today sharing another fun card featuring the NEW Release from La-La Land Crafts. For my card today, I chose these sweet little chipmunks from the Soy Happy For You Clear Stamp Set. Aren't they adorable! I colored them up with Copics, fussy cut them out and popped them on top of this black and white background I created using the NEW Asian Flair Layering Stencil. Then I layered that on top of some super pretty patterned paper and cut the whole thing out with the largest stitched rectangle die. Then I added some strips of glitter paper and adhered all of it to a scalloped rectangle in black. A fun little sentiment and some enamel dots finish it off. Love how this turned out!
Sunday, September 27, 2020
Not 2 Shabby Shop Sleeping Fox
Wednesday, September 23, 2020
Picket Fence Studios Seamless Stamps!
Hello, hello! Today, I'm sharing two more cards featuring a couple of the seamless stamps from the September Release. Be sure to hop over to the shop and check out all the new goodies!
For my first card, I used the NEW All Wired Seamless Stamp! How fun is this! I only stamped it one time for my project, but the really cool thing about these seamless stamps is that the match up perfectly and you can stamp them multiple times to create a background in whatever size you want! For my card, I stamped it once, trimmed it into a square and mounted it on a piece of black card stock. I colored it up with my Copic Markers and added a few highlights with my white gel pen. I thought this background would coordinate well with BFF Claire. So I colored her up, cut her out with the coordinating dies, and popped her on top of my card using foam tape. Then I added a "happy birthday" sentiment from the Kylee Boo Stamp Set. I just love how this turned out! Such a fun way to say, "happy birthday."
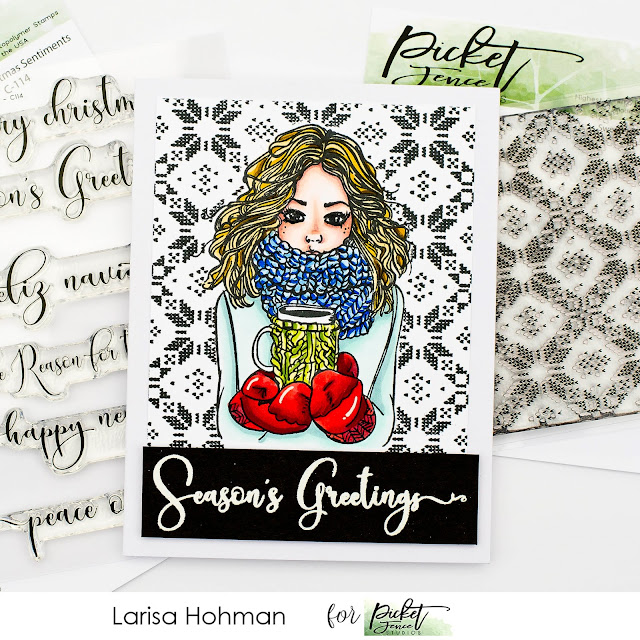
For my next card, I used the NEW Sweater Pattern Maker Stamp. This is another seamless stamp that matches up perfectly when you stamp it multiple times. For my card, I stamped it twice. You can't even tell. It really is seamless! I decided to pair it with the Jill Girl Stamp. I stamped her out first, masked her off and then stamped my background on top. I kept things classic and stamped the pattern in black on white card stock. Then I trimmed it into a rectangle and mounted it to the front of my card base. I removed the mask and colored the image up with Copics. For the sentiment, I used the NEW Fancy Christmas Sentiments Set. I stamped my sentiment on a chunky piece of black card stock and heat embossed it in white. Then I added it to the bottom of my card, and there you have it, one warm and cozy holiday card.
La La Land Crafts September 2020 Release Day #3
Tuesday, September 22, 2020
La-La Land Crafts September 2020 Release Day #2
Hello, I'm back today sharing another fun card from the NEW Release at La-La Land Crafts! Today, I'm featuring Marci with Pen! I've paired her with several of the new dies to create a fun little card. I paper pieced her leggings and headband, colored her up with Copics, and fussy cut her out. Then I layered her on top of some patterned paper and added some coordinating dies. A few enamel hearts finish it off.
Monday, September 21, 2020
La-La Land Crafts September 2020 Release Day #1
Hello!!! It's Release Day at La-La Land Crafts!!!! So many stamps, dies, stencils, papers, etc. released! You don't want to miss it! Be sure to stop by the store to check out all the new goodies!
For my card today, I'm featuring the NEW Happy Mail Clear Stamp Set. I paired it with a bunch of the new dies and even some of the new paper! First, I die cut a piece of white card stock with the NEW Postage Square Die. Then I added a layer of blue patterned paper on top. I LOVE that the Double Stitched Squares Die pairs perfectly with the NEW Postage Square Die! Then I layered on a strip of yellow paper from the NEW Asian Fusion Paper pack. Then I layered on top the NEW Left Pocket Die and added a pink tag and mini postage stamp. On the front of the pocket, I added some heart paper, my little stamped piggy, and the Ink Well. I just love how this turned out. So many great new products that make creating a breeze!~
Sunday, September 20, 2020
The Greeting Farm Cheeky Girly Girls!
Hello! Today, I'm sharing a fun slimline card featuring 3 of the adorable girls from The Greeting Farm Cheeky Girly Girls Kit. Unfortunately, this kit is no longer available for purchase, but you could easily re-create something similar with other Cheeky Stamps!
For my card, I used the Slimline Marquee Die from Whimsy Stamps. Then I layered that on top of the Scalloped Rectangle from the Gallery Frame #5 Die from Hello Bluebird. For the patterned papers I used La-La Love from Crate paper. I layered it all together then popped on my colored images with foam tape. I also added some puffy hearts and a "mwah" chipboard sticker to the bottom. I just love how this turned out! These 3 little Cheekies on one card! So much fun!
Friday, September 18, 2020
CC Designs Tiny Halloween!
Hello there! Today, I have another fun Halloween Card to share! This is Tiny Halloween from CC Designs! To create my card, I started with some patterned paper and layered it up in the background. Then I added some strips across the bottom and adhered it together. Then I folded an orange strip into a ribbon and stitched it down the center. I added that to the bottom as well. I stamped out my image, colored it up with Copics, and fussy cut it out. I layered that on top of my papers and tucked some die cut leaves in behind. Then I added a few enamel dots, my sentiment, and a couple of glittered bats. So much fun!!!
Thursday, September 17, 2020
The Greeting Farm Holiday Anya
Hello there! I just wanted to share a sweet little holiday card I made using the oh-so-adorable Holiday Anya 6. This might be my most favorite Greeting Farm image although I do love them all so that's a tough choice! For my card, I started with some patterned paper and mounted that on a piece of white card stock. I used my sewing machine to make a messy stitch around the perameter and adhered that to the base of my card (kraft). Then I hot-glued one of those plastic glittered ornaments from Hobby Lobby to the center of my card and added a die cut red circle to the center of it. I also added some messy gold thread to the top of that and then popped up my stamped/colored Any image on top using some foam tape.
For the bottom portion of my card, I cut a strip of kraft colored patterned paper and folded it to create a ribbon. I stitched one line down the center and glued that to the bottom of my card. Then I punched out some green branches and used a "Joy" sentiment from a holiday sticker pack in my stash. I just LOVE how this turned out. Such a fun and festive card that makes me long for the days of winter.
Monday, September 14, 2020
Picket Fence Studios - September 2020 Release and Blog Hop!!!!
Hello, hello! Today is release day at Picket Fence Studios!!!! We're also having a blog hop! Be sure to hop along and leave a comment at each stop for your chance to win one of two $50 gift cards to Picket Fence Studios!
For my first card, I used the NEW Dragon Fruit Clear Stamp Set and paired it with the NEW Slimline Dashes Stencil. I just love how it turned out! First, I die cut a piece of black card stock with a scalloped rectangle die in my stash. Then I trimmed a piece of white card stock to fit inside and used some Black Distress Oxide Ink to create a dashed pattern with the NEW Slimline Dashes Stencil. I stamped and masked my Dragon Fruit images, colored them up with Copic Markers, and fussy cut them out. Then I popped them up on top using some foam tape. I added a "hello" sentiment to the side and sprinkled some Gin and Tonic Sequins around the card. Love!


La-La Land Crafts Music
Hello! This week's theme at La-La Land Crafts is Music! So I created this cute little card featuring the
Rock On Hippos! I used some patterned paper and the Curtain Die to create a little stage. Then popped my hippos on top using some foam tape. I added the Musical Note Border Die across the bottom and finished it off with some die cut stars and my sentiment. Such a fun and totally Rockin' card!
Sunday, September 13, 2020
CC Designs Witchy Way
Hello! Hope you are having a great weekend! Today, I'm sharing a fun Halloween card featuring the NEW Witchy Way stamp set from CC Designs! I just love this set and had so much fun creating this card! I just layered up some Doodlebug papers, colored up my image, fussy cut her, and popped her on top using some foam tape. Then I added a die cut sentiment and some enamel dots. Quick and easy!


