

Hello, today I'm so excited to share a fun tutorial on how to get the most out of your die by using the Suitcase Box Die to make a pop up card!

To complete this project, you will need:
1. Heavy white card stock. I'm using Neenah Smooth Class Crest White 110lb.
2. Copic Markers (colors listed below)
3. Images/die cut embellishments to add to you finished scene
4. Patterned Paper
Let's get started:
Step 1: Use the Suitcase Box Die to cut two pieces from heavy weight card stock. Then cut a rectangle from the same white card stock 4.5x1 inch. Score each side at 0.5 inches.

Step 2: Trim off the bottom on both panels at the score line. On one of the panels trim off the little squares so that it looks like the picture below.

Step 3: Fold on the sore lines and insert the small rectangle piece that you previously cut. Adhere towards the top like the picture shown below.

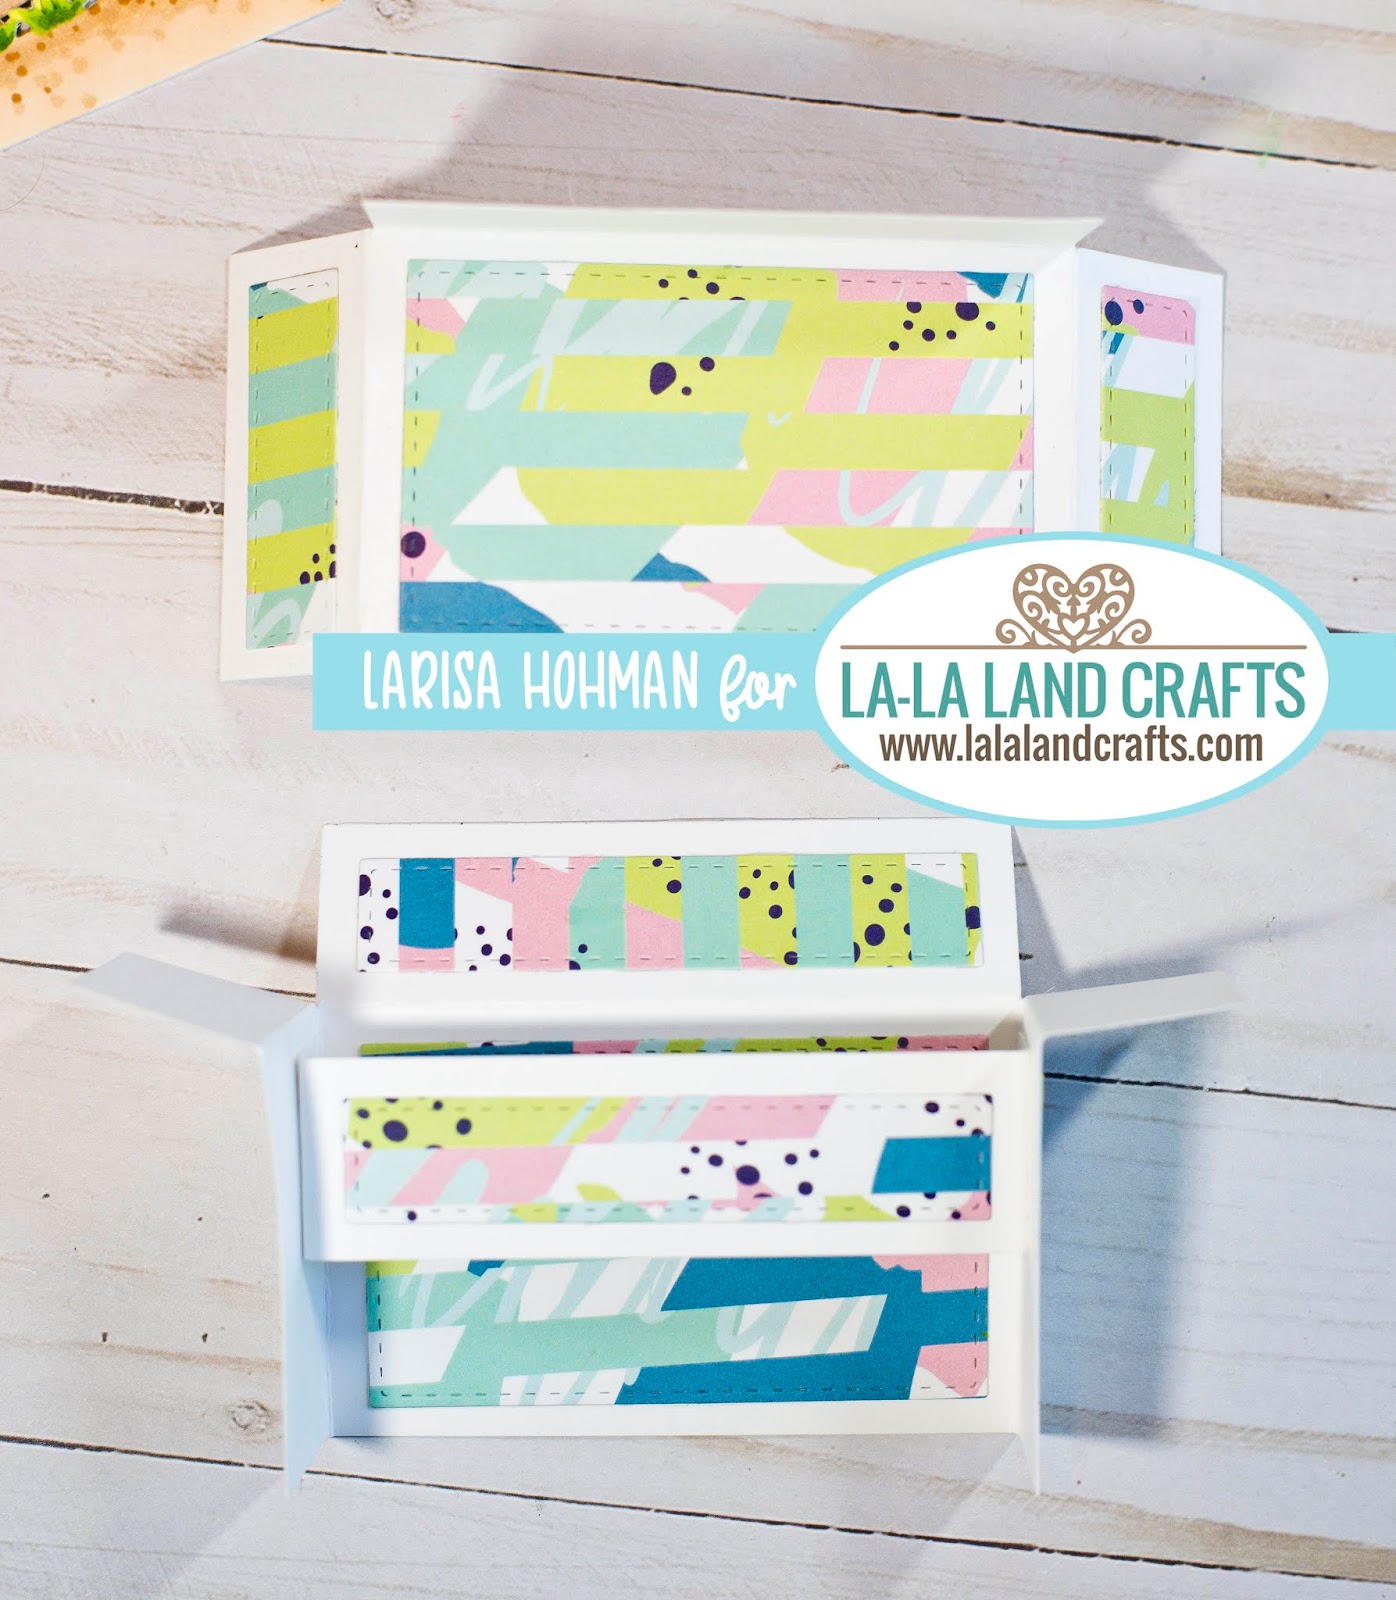
Step 4. Set the box pieces aside and use the stitched rectangle pieces from the die set to cut several pieces of patterned paper to decorate your box.

Step 5: Adhere stitched rectangle pieces to the outsides and inside of panel pieces. Use the picture below for a reference.
Step 6: Adhere the front panel to the back panel to create a pop up card. When finished, it should look like a box with the bottom cut out. You can press the card flat to mail and pop it up to display.

Step 7: Decorate your pop up card with stamped images, sentiments, and die cuts.


Project Details:
Copic Colors:
Penguins: C0, C1, C3, C5, C7, C9, YR15, YR28, R20
Blue: B24, B26, B29
Teal: BG10, BG11, BG13
Purple: BV000, BV01, BV13
Green: YG21, YG25, YG67
Pink: RV21, RV23, RV25
Sand: E30, E31, E35
Yellow: Y21, Y26
Thank you so much for stopping by! Have a great day!
No comments:
Post a Comment