Tuesday, October 29, 2019

Greeting Farm Miss Anya Hello Winter

Hello!  Recently, I had a chance to work with the new Greeting Farm set Miss Anya Hello Winter and I just love how my cards turned out!  


To being, I started with some Bristol Smooth Cardstock.  I mixed some of my Distress Oxide Inks with water and did a little water coloring on the background.  I have absolutely zero water color skills, but I was pleasantly surprised by how it turned out.  I also added a few splatters and set it aside to dry.  I colored my Anya images with Copic markers and cut them out using my Scan N Cut 2.  Then I popped them on top of my water colored backgrounds using foam tape.  Each of them is a little different, but I just love how they all turned out.  Such a fun and easy way to create a holiday card!  


Card Details:


Monday, October 28, 2019

La-La Land Crafts Thanksgiving/Gratitude

Hello!  This week's theme at La-La Land Crafts is Thanksgiving/Gratitude.  I thought it would be fun to create a card featuring some of the different little characters La-La Land Crats has released over the last year.  To begin, I started with some light blue card stock.  I used distress ink and the new Summer is Here Layering Stencil to create a background of clouds.  Then I inked up some die cut grass and adhered that across the bottom.  I also added some die cut birch trees, a cute little fence and a tree stump.  Then I was time to color up my little images and cut them out on my Scan N Cut 2.  Once that was finished I adhered them to my card.  Some of them are popped up using foam tape and others are glued straight to the card.  To finish it off, I added my sentiment to one of the clouds and included a few enamel heart stickers.  Such a fun and whimsical card!  


here's a look at the inside:


Card Details:
Traveling Cats Clear Stamp Set: https://www.lalalandcrafts.com/Traveling-Cats-Clear-Stamp-Set_p_1006.html
Sew Amazing Clear Stamp Set: https://www.lalalandcrafts.com/Sew-Amazing-Clear-Stamp-Set_p_1007.html
Relax and Unwind Clear Stamp Set: https://www.lalalandcrafts.com/Relax-Unwind-Clear-Stamp-Set_p_1023.html
Best Gnomies Clear Stamp Set: https://www.lalalandcrafts.com/Best-Gnomies-Clear-Stamp-Set-_p_1025.html
Best of Cluck Clear Stamp Set: https://www.lalalandcrafts.com/Best-of-Cluck-Clear-Stamp-Set_p_1077.html
In Hog Heaven Clear Stamp Set: https://www.lalalandcrafts.com/In-Hog-Heaven-Clear-Stamp-Set-_p_1080.html
This Little Piggy Clear Stamp Set: https://www.lalalandcrafts.com/This-Little-Piggy-Clear-Stamp-Set_p_1079.html
Stitched Sun and Clouds Die: https://www.lalalandcrafts.com/Stitched-Sun-and-Clouds-Die_p_749.html
Grass Border Die: https://www.lalalandcrafts.com/Grass-Border-Die_p_570.html
Broken Fence Die: https://www.lalalandcrafts.com/Broken-Fence-Die_p_531.html
Birch Trees Die: https://www.lalalandcrafts.com/Birch-Trees-Die_p_766.html
Stump with Twig Die: https://www.lalalandcrafts.com/Stump-with-Twig-Die_p_1029.html
Summer is Here Layering Stencil: https://www.lalalandcrafts.com/Summer-is-Here-Layering-Stencil-_p_1090.html

Copic Colors:
Skin: E000, E00, E11, E04, R20
Yellow: Y21, Y26, R22
Orange: YR04, YR16, YR27
Hippo: W0, W1, W3, W5
Purple: BV000, BV01, BV12
Pink: RV10, RV11
Red: R24, R27, R56, R59
Blue: B24, B26, B29
Pig: R000, R11, R20

Thanks so much for stopping by!  


Thursday, October 24, 2019

La-La Land Crafts Tutorial Thursday- Creating a Pop Up Box

Hello, today I'm so excited to share a fun tutorial on how to get the most out of your die by using the Suitcase Box Die to make a pop up card!    


To complete this project, you will need:
1. Heavy white card stock.  I'm using Neenah Smooth Class Crest White 110lb.
2. Copic Markers (colors listed below)
3. Images/die cut embellishments to add to you finished scene
4. Patterned Paper

Let's get started:

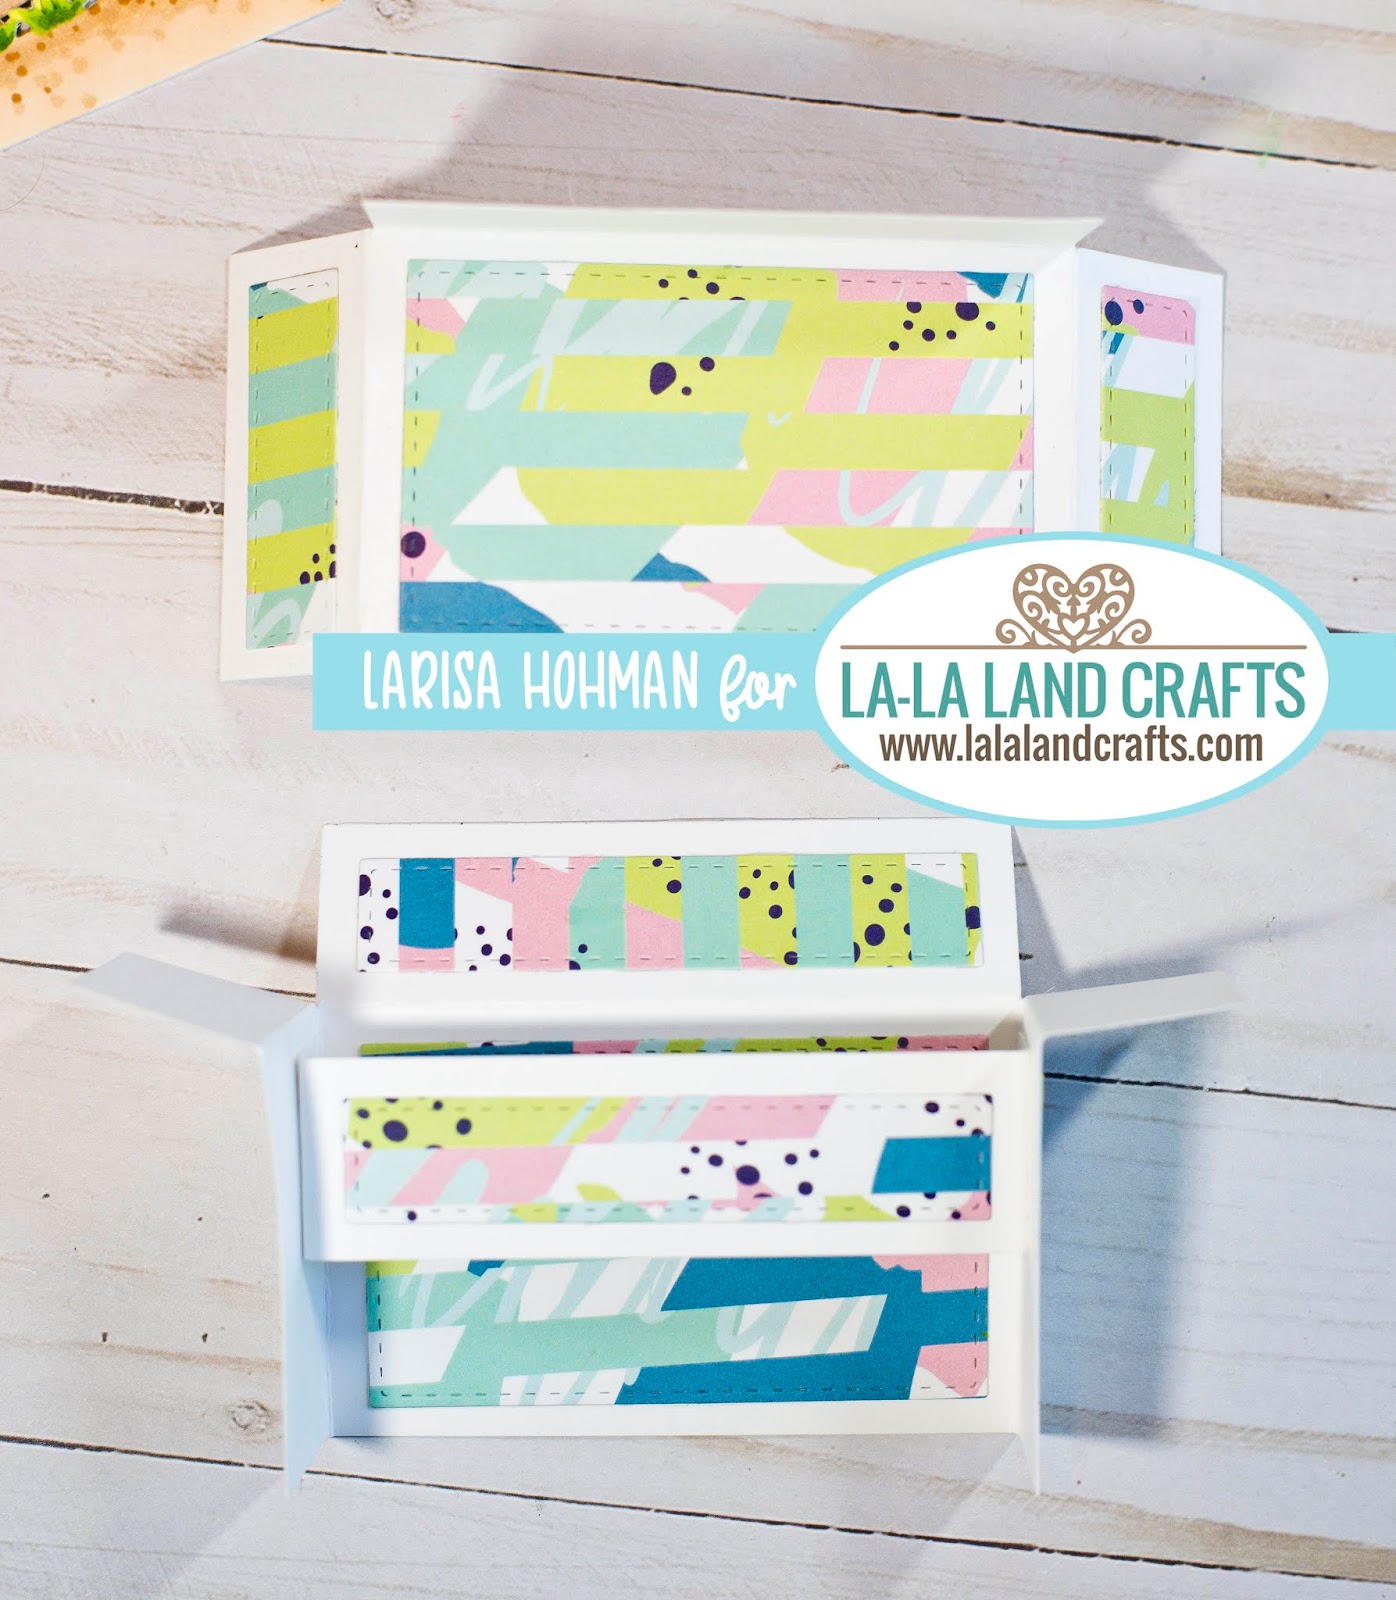
Step 1:  Use the Suitcase Box Die to cut two pieces from heavy weight card stock.  Then cut a rectangle from the same white card stock 4.5x1 inch.  Score each side at 0.5 inches.    


Step 2: Trim off the bottom on both panels at the score line.  On one of the panels trim off the little squares so that it looks like the picture below.  


Step 3: Fold on the sore lines and insert the small rectangle piece that you previously cut.  Adhere towards the top like the picture shown below.  


Step 4. Set the box pieces aside and use the stitched rectangle pieces from the die set to cut several pieces of patterned paper to decorate your box.  


Step 5: Adhere stitched rectangle pieces to the outsides and inside of panel pieces. Use the picture below for a reference.  


Step 6: Adhere the front panel to the back panel to create a pop up card.  When finished, it should look like a box with the bottom cut out.  You can press the card flat to mail and pop it up to display.  


Step 7: Decorate your pop up card with stamped images, sentiments, and die cuts.  


Project Details:

Copic Colors:
Penguins: C0, C1, C3, C5, C7, C9, YR15, YR28, R20
Blue: B24, B26, B29
Teal: BG10, BG11, BG13
Purple: BV000, BV01, BV13
Green: YG21, YG25, YG67
Pink: RV21, RV23, RV25
Sand: E30, E31, E35
Yellow: Y21, Y26

Thank you so much for stopping by!  Have a great day!


CC Designs Christmas Cuties

Hello!  Today, I'm sharing a fun little pageant card using the NEW Christmas Cuties Stamp and die set from CC Designs!  For my card, I started with some patterned paper from Doodlbug Designs.  I used a curtain die from my stash to create a little stage scene.  Then I colored up my little cuties and cut them out using the coordinating dies.  I used foam tape to pop them on top of my stage and added some sentiments from the coordinate die cuts that go with the paper.  To finish it off, I added some enamel dots and stars to the background.  


here's a look at the inside:


Thanks so much for stopping by!  Have a great day!

Card Details:

Tuesday, October 22, 2019

Club La-La Crafts October 2019 Kit

Hello!  Today, I'm back sharing some more fun cards using the NEW Club La-La Land Crafts Kit for October 2019!  This kit is packed with adorable stamps and dies, perfect for creating winter scenes.  

For my first card, I paired Marci with one of the adorable little pigs.  First, I created my background scene using the new dies that come in the kit.  I started with some polkadot patterned paper for my background and layered some grey mountains on top.  Then I added a few layers of white snow and popped on a few green polka dot trees.  I colored up Marci and my little pig using Copics and fussy cut them out using my Scan N Cut 2.  Then I used foam tape to pop them on the front of the card.  


here's a look at the inside:


Card Details:

Copic Colors: 
Pigs: R000, R11, R20, E97
Red: R24, R27, R56, R59
Blue: BG10, BG11
Green: YG21, YG25, YG67

For my Next card, I used the little ice-skating pig as well as the snowman from the set.  Like the first card, I started with some patterned paper and layered my mountains on top.  Then I die cut it into a square and added my little pond and snowman in the background.  I also popped on a few trees in the background.  Then I used foam tape to layer the panel on top of some green patterned paper and added some twill ribbon to the bottom a little red tag with tree complete the card.  


A look at the inside:


Card Details:

Copic Colors: 
Pigs: R000, R11, R20, E97
Red: R24, R27, R56, R59
Blue: BG10, BG11
Green: YG21, YG25, YG67


Friday, October 18, 2019

CC Designs Hipster Santa


Hello!  Today, I have a VERY fun Christmas card to share with you.  This is Hipster Santa and he's NEW at CC Designs!  How fun!  For my card, I used some patterned paper to create a winter scene.  I chose some birch trees and used a hills die to make a layer of snow at the bottom.  Then I colored up my Santa with Copic Markers and fussy cut him out using my Scan N Cut 2.  Then I popped him on top of my winter scene and mounted that on top of a black scalloped rectangle.  Then I added my sentiment to the bottom and layered the whole thing on top of some red snowflake paper.  A pretty simple card, but I think it makes an impact!  


Thanks so much for stopping by.  Have a great day!  

Card Details:

Tuesday, October 15, 2019

Club La-La Land Crafts October 2019 Kit Reveal

Hello! Today, I am so excited to share the new Club La-La Land Crafts Kit for October 2019.  This kit is packed full of adorable winter-themed stamps and dies!  If you're not already subscribed, be sure to check out the site HERE and be sure to sign up by October 20th!  

For my first inspiration card, I used the adorable winter Marci.  First, I colored her up in soft colors and fussy cut her out using my Scan N Cut 2.  Then I create a beautiful winter scene using some of the new paper in the shop.  I die cut my mountains form some light tan cardstock and added them to my background.  The I layered on some white snow drifts and popped Marci on top using some foam tape.  I also added the little snowman from the pig stamp set.  To finish the card off, I added my sentiment and a few rhinestone embellishments.  So fun!  


here's a look at the inside:


Card Details:
Double Stitched Circle Dies: https://www.lalalandcrafts.com/Double-Stitched-Circles-Die_p_781.html
Pierced Scalloped Circles Die: https://www.lalalandcrafts.com/Pierced-Scalloped-Circles-Die_p_789.html
Get Inky Paper Pack: https://www.lalalandcrafts.com/Get-Inky-Paper-Pack_p_1104.html

Copic Colors:
Skin: E000, E00, E11, E04, R20
Hair: Y21, Y26, E87
Pink: RV21, RV23
White: C0, C1, C3
Blue: BG10, BG13, BG57
Green: YG21, YG25, YG67

My next card features the little pigs.  First, I started with some kraft colored patterned paper.  Then I die cut my mountains out of black card stock and added them to my scene.  I used several of the die cut trees in the background and added some white card stock to the bottom of the card for snow.  Then I die cut one of the snow drifts and added that on top.  I also cut the oval die from grey card stock and added it to my scene as a skating pond.  Then I colored up all of these little piggies, cut them out using my Scan N Cut 2, and popped them on top with foam tape.  


here's a look at the inside: 


Copic Colors:
Pigs: R000, R11, R20, E97
Grey: W0, W1, W3, W5
Red: R24, R27, R56, R59
Tan: E30, E31, E33, E35
Blue: BG10, BG11