Monday, September 30, 2019

La-La Land Crafts Just Chill

Hello! Today, I'm sharing yet another card from the new September Release at La-La Land Crafts!  This adorable stamp set is called Just Chill.  You can find it here along with all the other new stamps, dies, papers, and stencils this month!  

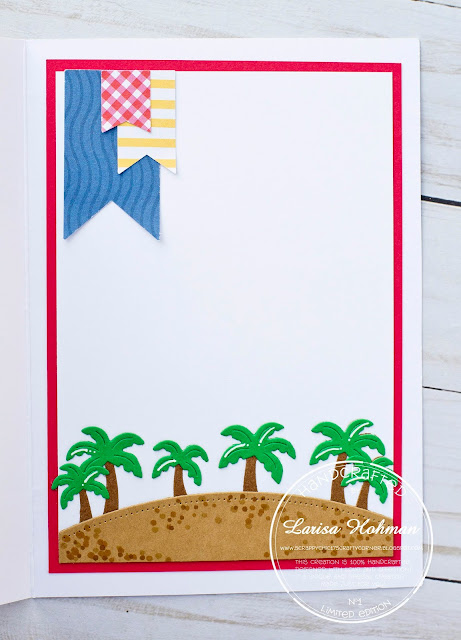
For my card, I decided to create a little summer scene.  First, I started with a piece of white card stock.  I used the NEW Summer Is Here Layering Stencil to create my sky and waves.  Then I die cut some pieces of kraft card stock to make my sand.  I colored up these cute little penguins and cut them out using my Scan N Cut 2.  Then I popped them on top of my scene using some foam tape.  To embellish my scene I used several of the new dies.  I added a cute little hammock and umbrella complete with palm trees, a cruise ship, some birds, and even a tropical tree with pink flowers.  I had so much fun creating this card!  Such a great way to say "hello."  


Card Details:
Just Chill Clear Stamp Set: https://www.lalalandcrafts.com/Just-Chill-Clear-Stamp-Set-_p_1102.html
Summer Is Here Layering Stencil: https://www.lalalandcrafts.com/Summer-is-Here-Layering-Stencil-_p_1090.html
Hammock Island Die: https://www.lalalandcrafts.com/Hammock-Island-Die_p_1093.html
Tropical Leaves Die: https://www.lalalandcrafts.com/Tropical-Leaves-Die_p_1095.html
Luggage Tag Die: https://www.lalalandcrafts.com/Luggage-Tag-Die_p_1096.html
Port Hole Die: https://www.lalalandcrafts.com/Port-Hole-Die_p_1097.html
Birch Trees Die: https://www.lalalandcrafts.com/Birch-Trees-Die_p_766.html
Double Stitched Hills Border Die: https://www.lalalandcrafts.com/Double-Stitched-Hills-Border-Die_p_704.html
Spring Blossoms Small Die: https://www.lalalandcrafts.com/Spring-Blossoms-Small-Die_p_324.html
Grass Patches Die: https://www.lalalandcrafts.com/Grass-Patches-Die_p_1072.html
Spring Window Die: https://www.lalalandcrafts.com/Spring-Window-Die_p_791.html
Double Stitched Ovals Die: https://www.lalalandcrafts.com/Double-Stitched-Ovals-Die-_p_1057.html
Pierced Scalloped Ovals Die: https://www.lalalandcrafts.com/Pierced-Scalloped-Ovals-Die_p_1058.html

Copic Colors:
Penguins: C0, C1, C3, C5, C7, C9, R20
Orange: YR04, YR16, YR27
Teal: BG10, BG11, BG13
Yellow: Y21, Y26
Pink: RV10, RV21


Wednesday, September 25, 2019

La-La Land Crafts Never Change


Hello!  I have another fun card to share with you using the NEW release at La-La Land Crafts!  This card features the adorable Never Change Clear Stamp Set.  To create my card, I started with a sheet of patterned paper from the Get Inky Paper Pack.  I trimmed it down to fit my card, and adhered it the front of my card base.  Then I die cut the camera from white card stock and used a circle die to create a little tropical scene.  Then I adhered that to the front of the camera and popped the whole thing on top of the patterned paper using foam tape.  Then I colored up my little chameleon, cut him out using my Scan N Cut 2 and popped him on top of the card using foam tape.  I also die cut some leaves in coordinating color and tucked them in behind the camera and the chameleon.  To finish the card, I die cut the smile from pink card stock and added it to the left of the camera.  


Card Details:

Copic Colors:
Green: YG21, YG23, YG67
Red: R20, R22, R24
Brown: E31, E35, E37

Tuesday, September 24, 2019

La-La Land Crafts Plumeria Lei Marci


Hello!  I'm back today featuring the NEW Plumeria Lei Marci from La-La Land Crafts!  For my card, I used the new background stamp, Stress Free Zone, to create my background.  Then I added a cream scalloped border across the bottom.  I then cut some tropical leaves from various colors of green card stock and tucked them behind my island scene.  To create this scene, I started with an oval die and added some teal water and the new Tiki Hut Island Die, cut in various colors and paper pieced.  Then I stenciled in a cloudy background using the new Summer is Here Layering Stencil and adhered my island and water on top.  A couple of die cut birds flying in the sky and some enamel dots for my coconuts finish it off.  Then I color up Marci with Copics and cut her out on my Scan N Cut 2.  I popped her on top using some foam tape and there you have it!  One tropical paradise themed card!  


Card Details:

Copic Colors:
Skin: E000, E00, E11, E04, R20
Hair: Y21, Y26, E87
Teal: BG10, BG11, BG13, BG56


Monday, September 23, 2019

La-La Land Crafts Vacation Mona


Hello!  Today, I am so excited to share a fun "vacation" themed card using the NEW Stamps and dies from La-La Land Crafts!  All the new goodies are AVAILABLE NOW in the shop!  

For my card, I started with some pretty patterned paper from the new Golden Sunset Paper Pack.  Then I layered on a strip of white and gold stripped paper from the same pack.  I die cut a large Monstera Leaf from Coral card stock and added that to the top right of the card.  Then I created a little shaker using the Port Hole Die.  I used some gold foil card stock for this and added the little cruise ship inside.  I also die cut the smile sentiment from the camera die and added that just beneath it.  Finally, I added my Mona image with foam tape.  I colored her up with Copics and cut her out using my Scan N Cut 2.  To finish the card off, I added a few white enamel dots scattered about.  


Card Details:

Copic Colors:
Skin: E000, E00, E11, E04, R20
Hair: E43, E47, E49
Yellow: Y21, Y26
Red: R20, R22, R24, R27
Blue: BG10, BG11, BG13

Friday, September 20, 2019

CC Designs Knitting Nancy

Hello!  Today, I'm popping on to share a fun little card with the NEW Knitting Nancy Clear Stamp set from CC Designs!  For my card, I chose some fun bright colors for my background and colored up my image to match.  Then I fussy cut her out with my Scan N Cut 2 and popped her on top of some patterned paper and mini doily.  I added a little yarn die cut, some enamel dots, and my sentiment.  Such a fun and simple card for any knitter in your life.  


Thanks so much for stopping by!  

Card Details:

Thursday, September 19, 2019

Stamping Bella Oddball Alice in Wonderland

Hello!  Today, I am so excited to share a fun little Oddball Alice card with you guys!  To create my card, I used a ton of die cuts in my stash to layer up my background.  Then I colored my my Alice image and cut her out using my Scan N Cut 2.  I popped her on the front of my card with foam tape and heat embossed my sentiment in the top left-hand corner.  I just love how this turned out and I can't wait to make some more with the other Alice in Wonderland stamps!  All the details of the card can be found below.  


A look at the inside:


Tuesday, September 17, 2019

Club La-La Land Crafts September 2019 Club Kit


Hello!  I'm back today sharing a couple more fun cards using the NEW La-La Land Crafts September 2019 Club Kit.  Just a reminder that you have until September 20th to subscribe for this kit.  You can find all the info HERE!  

For my card, I chose some fun lemon themed patterned paper, added my "lemonade" sentiment across the top and mounted that on top of some navy blue card stock.  Then I colored up my Marci image with Copics and cut her out using my Scan N Cut 2.  I added a few strips of patterned paper across the bottom and layered Marci on top using some foam tape.  I also added a little paper doily from my stash as well as a die cut glass of lemonade and a couple of lemons!  


Card Details
Copic Colors: 
Skin: E000, E00, E11, E04, R20
Hair: Y21, Y26, E87
Red: R20, R22, R24, R27, R56, R59
Blue: B95, B97
Yellow: Y21, Y26
White: C0, C3


For my next card, I created a fun little scene using the mice.  I trimmed a piece of lemon paper to fit my card base and adhered that the top.  Then I die cut a white scalloped rectangle and layered a piece of blue patterned paper inside it.  I trimmed the bottom with a grassy border and tucked my lemonade stand behind it.  Then I added my mice, a leafy vine, and a sun and cloud.  I die cut my sentiment using a word bubble die and popped that on with some foam tape.  Then I added some glitter to my cloud and finished my mice with some white gel pen high lights.  


Card Details:

Copic Colors:
Mice: C0, C1, C3, C5, C7, E30, E31, E34, E35, E37, R20
Yellow: Y21, Y26
Green: YG21, YG25, YG67


Monday, September 16, 2019

La-La Land Crafts Boxes or Bags


Hello!  Today, I have a very fun little Halloween treat to share with you!  I've created a fun little treat box using the Build A House and Halloween Add On dies!  

To create my house I cut out two houses and decorated them using elements from the Halloween Add On set.  Then I attached the two together using a skinny rectangle measured to fit between them.  Then I added my little witches and popped my teat bag inside.  Such an easy, yet adorable project!  


Here's a look at the back:


Card Details:
Build A House Die Set: https://www.lalalandcrafts.com/Build-a-House-Die_p_919.html
Halloween House Add On Die Set: https://www.lalalandcrafts.com/Halloween-House-Add-On-Die_p_937.html
Happy Boo to You Clear Stamp Set: https://www.lalalandcrafts.com/Happy-Boo-to-You-Clear-Stamp-Set-_p_927.html

Copic Colors: 
Skin: E000, E00, E11, E04, R20
Hair: C5, C7, C9, Y21, Y26
Orange: YR12, YR16, YR27
Purple: V000, V12, V15

Sunday, September 15, 2019

Club La-La Land Crafts September Club Kit Reveal!

Hello!  Today, I'm so excited to share the new La-La Land Crafts September Club Kit.  This month the theme is all about LEMONS!  How fun!  Be sure to check out all the details of this month's kit HERE and subscribe before September 20th!  

For my first card, I used Marci with Lemons.  First I colored her up with my Copics and cut her out using my Scan N Cut 2.  Then I layered up some patterned paper in the background and added a die cut white doily.  I popped Marci on top using some foam tape and added a couple of die cut lemons and a tall glass of lemonade.  Then I finished it off with my sentiment and a few enamel dots.  So much fun!  


Card Details:
Stitched Nested Circles Die: https://www.lalalandcrafts.com/Stitched-Nested-Circles-Die_p_793.html
Mandala Doily Die: https://www.lalalandcrafts.com/Mandala-Doily-Die-_p_1059.html

Copic Colors:
Skin: E000, E00, E11, E04, R20
Hair: E43, E47, E49
Yellow: Y21, Y38, Y26
Black: C0, C1, C3, C5, C7, C9

For my next card, I used the adorable mice from the kit.  First, I colored them up with my Copics, cut them out with my Scan N Cut 2, and created an outdoor scene using my grass and clouds dies.  Then I used the adorable lemonade stand die set from the kit to complete the scene.  I added two of the mice with foam tape and added the "lemondade" sentiment across the top.  A little glitter on my clouds and some white enamel pen finishes the card off!  


Card Details: 
Stitched Sun and Clouds Die: https://www.lalalandcrafts.com/Stitched-Sun-and-Clouds-Die_p_749.html
Grass Border Die: https://www.lalalandcrafts.com/Grass-Border-Die_p_570.html
Grass Patches Die: https://www.lalalandcrafts.com/Grass-Patches-Die_p_1072.html

Copic Colors:
Mice: W0, W1, W3, W5, W7, C0, C3, C5, R20
Yellow: Y21, Y38, Y26
Green: YG21, Y25, Y67

Friday, September 13, 2019

Stamping Bella Curvy Girl Loves The Beach

Hello!  I have one more "summer" card to share with you guys as fall is on it's way!  This card features Stamping Bella Curvy Girl Loves The Beach!  I just love this stamp!  So cute! 
For my card, I used several dies from my stash to create my background.  Then I popped my image on top using foam tape, added some enamel dots to my palm trees and stamped my sentiment.  Then I layered it all on top of some patterned paper and finished it off with some ribbon.  I just love how this turned out!  Such a fun and playful summer card!  


a look at the inside: 


Thanks so much for stopping by!  

Wednesday, September 11, 2019

CC Designs Business Bella


Hello! Today, I have a fun little coffee themed card to share with you.  This is Business Bella from CC Designs!  She is part of the NEW September Release and you can find her HERE at the shop!  

For my card, I used a die from my stash and created a little coffee shop.  Then I added a big coffee cup in the window and popped my Business Bella image next to it with foam tape.  Then I added my sentiment to the bottom and mounted the whole thing on top of some patterned paper.  A few white highlights with gel pen finish it off.  


Card Details:

Tuesday, September 10, 2019

Hello Bluebird Flying By...

Hello!  Today, I have a fun little Hello Bluebird card to share with you.  This little guy is from the Maverick Clear Stamp Set.  I just love this set.  It comes with a little plane and several animals that can easily fit inside to drive the plane!  How fun!  To create my card, I used the Stitched Hillside Backdrop Die from Lawn Fawn.  I inked the background using a cloud stencil from MFT and layered on my die cut hills.  Then I added Some houses, a couple of trees and even a few bushes to create my scene.  I popped my little airplane bunny on top with some foam tape, stamped my sentiment, and added a couple yellow birds.  Then I mounted the whole thing on top of some yellow patterned paper and finished it off with some enamel dots.  

I just love how this turned out!  So much fun!


Card Details:


Monday, September 9, 2019

La-La Land Crafts Monochromatic

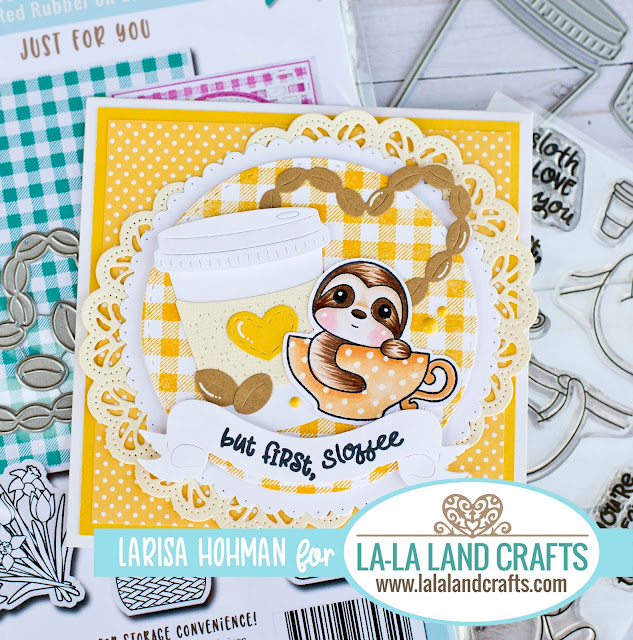
Hello!  This week the theme at La-La Land Crafts is Monochromatic!  For my card, I chose the color yellow and went with a coffee theme!  First, I layered up some yellow polka dot paper for my background.  Then I stamped out a yellow gingham pattern and die cut it into a circle.  I layered that on top of a couple doilies and them added my embellishments to the center.  I colored up my little sloth with a yellow polka dot cut and layered it on top of my die cut coffee cup.  Then I added my sentiment and a few coffee beans.  So cute!  


here's a look at the inside:

Card Details:
Take It Sloth Clear Stamp Set: https://www.lalalandcrafts.com/Take-it-Sloth-Clear-Stamp-Set_p_1014.html
Just For You Background Stamp: https://www.lalalandcrafts.com/Just-for-You_p_847.html
Coffee Cup Die: https://www.lalalandcrafts.com/Coffee-Cup-Die_p_700.html
Coffee Beans Heart Die: https://www.lalalandcrafts.com/Coffee-Beans-Heart-Die_p_615.html
Pierced Scalloped Circles Die: https://www.lalalandcrafts.com/Pierced-Scalloped-Circles-Die_p_789.html
Stitched Nested Circles Die: https://www.lalalandcrafts.com/Stitched-Nested-Circles-Die_p_793.html
Mandala Doily Die: https://www.lalalandcrafts.com/Mandala-Doily-Die-_p_1059.html
Scroll Banner Die: https://www.lalalandcrafts.com/Scroll-Banner-Die_p_550.html

Copic Colors:
Sloth: E30, E31, E33, E35, E37
Yellow: Y21, Y26


Thursday, September 5, 2019

CC Designs September Release!

It's release day at CC Designs!  So many new stamps, dies, paper, enamel dots, etc. released this month!  Be sure to hop over to the shop to check out all the new goodies!  

My card today features the new Rosie Riveter Clear Stamp Set.  This adorable set was so much fun to color and create with.  I colored her up with my Copics, cut her out with my Scan N Cut 2, and popped her on some vintage papers. Then I stamped out my sentiment and added a few enamel dots to finish it off.  


Thanks so much for stopping by!  Have a great day!  

Wednesday, September 4, 2019

Hello Bluebird Spooky Night Instagram Challenge!

Hello!  Today, I'm sharing a fun little Hello Bluebird card I made for the first ever Hello Bluebird Instagram Challenge!  This month's theme is Spooky Night.  You can find all the details HERE on their Instagram Post!  

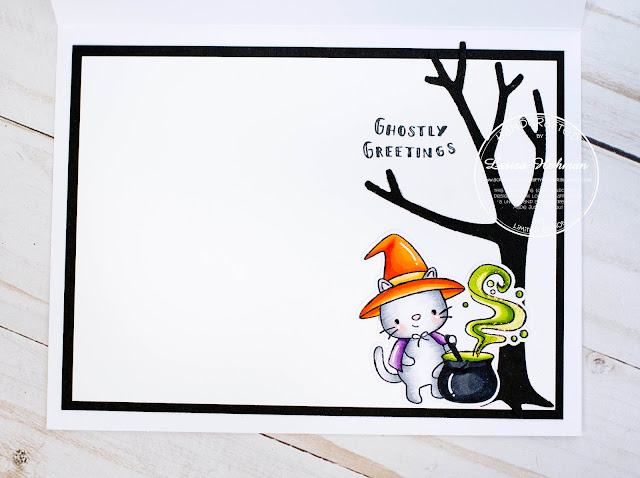
For my card, I created a little spooky scene using several stamps and dies from Hello Bluebird.  To begin, I die cut the Spooky Scene Die from various colors of card stock.  Then I used distress inks to create my purple background and adhered all of it to a white card panel.  I used some Stickles Glitter to create some glitter splatters on my background and stamped a few stars in black from the Ghostly Greetings Clear Stamp Set.  Then I added a couple of grey gravestones to my scene and I stamped RIP on one of them using the Ghostly Greetings Stamp Set as well.  I colored up my images with Copic markers and used the coordinating dies to cut them out.  Then I adhered them to my card using glue and foam tape.  To finish the card off, I added a black spider web doily behind my panel and mounted it all on top of an orange polka dot background.  The sentiment is from the Halloween Party Stamp set and I just trimmed it into a banner with scissors.  


Here's a look at the inside:


Card Details:


CC Designs September Release Preview Day 2: October and November

Hello!  Today, I'm so excited to share a preview of the NEW October and November Clear Stamp set from CC Designs!  This cute set features several little cuties ready for Halloween and Thanksgiving!  

For my card, I decided to use the little Halloween animals.  First, I created a spooky little scene using some patterned papers and die cuts in my stash.  Then I added my colored images that I cut using the Coordinating Dies.  To finish off my card, I added some email dots, glitter, and white gel pen high lights.  


here's a look at the inside:


Thanks so much for stopping by!  Be sure to stop by the CC Designs Blog to see all the fun design team samples!  

Monday, September 2, 2019

La-La Land Crafts Back to School

Hello! This week's theme at La-La Land Crafts is Back To School!  I thought it would be fun to create a little tag for a teacher gift.  First, I die cut my tag from some patterned paper and layered on some coordinating patterns.  Then I created a little chalk board using the Scalloped Rectangles die and popped my little pig in front with some foam tape.  I heat embossed my sentiment in white to look like chalk and even added a little stick of chalk at the bottom.  Then I die cut a blue scalloped circle for the top of the tag and added some gingham ribbon.  


Card Details: 
In Hog Heaven Clear Stamp Set: https://www.lalalandcrafts.com/In-Hog-Heaven-Clear-Stamp-Set-_p_1080.html
Scalloped Rectangles Die: https://www.lalalandcrafts.com/Scalloped-Rectangles-Die_p_884.html
Pierced Scalloped Circles Die: https://www.lalalandcrafts.com/Pierced-Scalloped-Circles-Die_p_789.html
Large Stitched Tags Die: https://www.lalalandcrafts.com/Large-Stitched-Tags-Die_p_953.html
Small Stars Die: https://www.lalalandcrafts.com/Small-Stars-Die-_p_988.html

Copics:
R000, R11, R20, E97
Red: R24, R27, R56, R59

Sunday, September 1, 2019

Moonlight Whispers Trick or Treat


Hello!  Today, I have a very fun and spooky card to share with you!  It's September and that means my Halloween card-making is in full swing!  For this card, I started with my image.  It's part of the coloring pack from Annie Rodrigue at 7 Kids Crafts. I colored her up with my Copics and cut her out with my Scan N Cut 2.  Then I used the Leafy Tree Backdrop die from Lawn fawn to create my background.  I cut it out from glitter paper and layered that on top of a purple background I created using distress inks.  Then I added a few spooky clouds, a tombstone and some green grass.  To finish the card off, I used my white gel pen to add some star details to the background as well as some highlights on my tombstone.  I just LOVE how this turned out! So much fun!  


Thanks so much for stopping by!  Have a great Day!