Monday, November 30, 2020

La-La Land Crafts December 2020 Release: Snowboard Luka

 Hello!  Happy Monday!  Today, I'm sharing a fun winter card featuring the new stamps and dies from La-La Land Crafts!  You can find all the NEW Goodies HERE.  Be sure to hop over there and check it out!

For my card, I started with a sheet of the new patterned paper and trimmed it to fit the front of my card base.  Then I die cut the mountains, ski lift, and trees from card stock and layered them together in my background.  I used some white glitter card stock for my snowy ground and added some die cut pond elements to look like drifts of snow.  Then I colored up Luka, fussy cut him out and popped him on top of my scene using some foam tape.  I also die cut the skis from blue card stock and added those to the scene with foam tape as well.  A fun little sentiment finishes it off!


Card Details:

Copic Colors:
Skin: E30, E31, E33, E34, E35, R21
Hair: C5, C7, C9
Blue: B24, B26, B29
Teal: BG10, BG11, BG13
Green: YG21, YG23, YG67


Wednesday, November 25, 2020

Picket Fence Studios Slim Line Cards!

 Hello, hello! Today, I'm sharing two fun and easy cards using the new Slim Line Die Cutting System as well as some of the new products from the November Release!  All products used are linked below.  Be sure to check out the Picket Fence Shop to see all the new goodies!  

For my first, card, I started with some teal card stock and die cut it using the largest rectangle from the Slim Line Die Cutting System.  Then I use the smaller rectangle from a lighter blue card stock.  I used the stitched circle die in the set to create random circles on my lighter blue panel.  Then I adhered it to the teal piece.  

I used some of the new snowflake dies to cut snowflakes in various sizes from white card stock, holographic card stock, and glassine paper.  Then I layered them on top of my card and adhered with Glossy Accents.  I added some scattered sequins throughout the card and finished it off with a sentiment heat embossed in white on black card stock.  Such a quick and easy card that really packs a punch!  


For my next card, I used the new Slim Line Die cutting System and paired it with the new Pet all the Dogs Stamp Set and Coordinating Dies.  To begin, I chose a bright blue piece of card stock and die cut it using the largest rectangle in the set.  Then, I die cut a piece of white card stock using the smaller rectangle die.  I used the picket fence die to cut three openings in my white panel.  Then I used the grass die to cut  three grass pieces from green card stock.  I layered each one behind the picket fence openings and adhered them together.  Then I colored up my dogs, cut them out using the coordinating dies, and tucked one of them in between my grass and fence.  Then I adhered it all together and popped my dogs on top using foam tape.  I stamped my sentiment across the top and added some die cut clouds from the A Spooky Day Stamp and Coordinating Die set.  

Again, another quick and easy card that's sure to brighten anyone's day!  


Products Used:


Hope you have a great week!  Thanks so much for stopping by!!

Monday, November 23, 2020

La-La Land Crafts : Encouragement


Hello!  Today, I'm sharing a fun little encouragement card featuring Soy Happy For You from La-La Land Crafts.  To create my card, I started with some patterned papers from the Asian Fusion Paper Pack.  I die cut it with the Double Stitched Rectangles Die and layered on top of a black scalloped rectangle.  Then I trimmed a piece of white card stock into a rectangle and adhered that to the top of my card panel and trimmed each side with some gold foiled card stock.  I stamped my sentiment towards the bottom and added my colored image and die cut Garden Lantern just above it.  Such a fun little encouraging card to cheer anyone up!  

Card Details: 
Soy Happy For You Clear Stamp Set https://www.lalalandcrafts.com/Soy-Happy-for-You-Clear-Stamp-Set_p_2335.html
Asian Fusion Paper Pack https://www.lalalandcrafts.com/Asian-Fusion-Paper-Pack_p_2333.html
Double Stitched Rectangles Die https://www.lalalandcrafts.com/Double-Stitched-Rectangles-Die_p_2323.html
Garden Lantern Die https://www.lalalandcrafts.com/Garden-Lantern-Die_p_2330.html
Small Hot Air Balloon Die https://www.lalalandcrafts.com/Small-Hot-Air-Balloon-Die-_p_998.html

Copic Colors:
Hamster: E30, E31, E33, E35, R20
Red: R24, R27, R56, R59
Dim Sum: E50, E53

Tuesday, November 17, 2020

25 Days of Christmas Tags: Picket Fence Studios


Hello!  I am thrilled to be joining the 10th Annual 25 Days of Christmas Tags Event hosted by Tracey McNeely!  You can find her blog here: http://inmycreativeopinion.blogspot.ca 

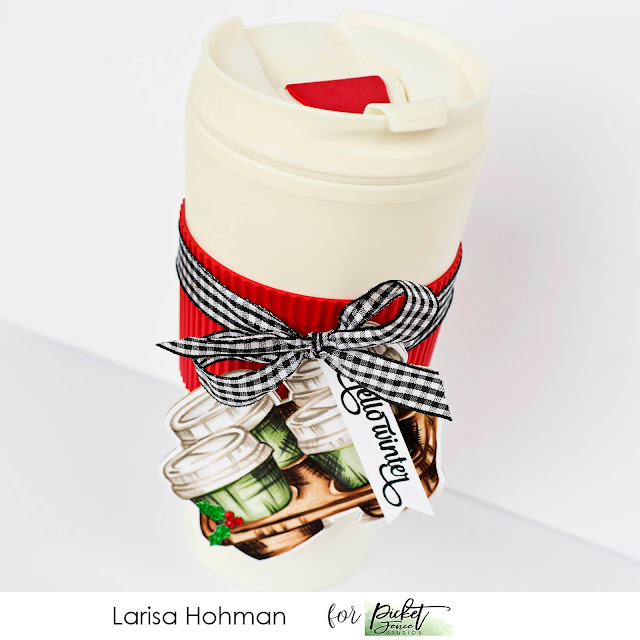
Today, I'm showcasing a fun holiday tag featuring the Sponsored By Coffee Clear Stamp Set and Coordinating Die from Picket Fence Studios!  For my tag, I stamped my image out in light tan ink and colored it in with Copics.  Then I cut it out using the coordinating die.  I also used the coordinating die to cut a piece of thin chipboard and another piece of blank white card stock.  Then I adhered them all together so that my chipboard layer was sandwiched between the two piece of card stock.  This give the tag some stability and a finished look.  


Then, I stamped out my sentiment on another piece of white card stock and trimmed it into a banner.  I added white eyelets to my tag and sentiment strip and tied them both together using twine.  A black and white gingham bow and a little 3D holly sticker finish it off.  


A cute little holiday tag that can be tied to the top of a gift or added to a coffee mug.  


Tag Details:


Copic Colors:
Red: R24, R56, R59
White: W0, W1, W3, W5
Green: YG61, YG63, YG67, C7
Tan: E31, E33, E35, E37, E47


Thanks so much for stopping by!  Below is a list of sponsors for this year's 25 Days of Christmas Tags Event!  


Monday, November 16, 2020

La-La Land Crafts Tag

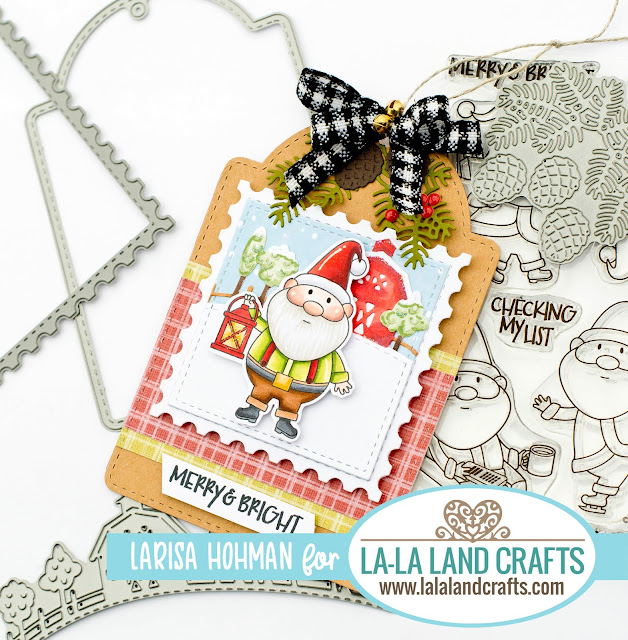
 Hello!  Today, I'm sharing a sweet little Christmas Tag featuring the Dear Santa Clear Stamp Set from La-La Land Crafts!  To create this little tag, I started with my image, stamped him out, and colored him up with my Copics.  Then I die cut the Country Hill Die from some White card stock and colored it up to look like a winter farm scene.  I die cut that using the stitched squares die and layered that on top of a white die cut postage stamp.  Then I added some patterned papers to my kraft tag and popped on my feature image using foam tape.  At the top of the tag, I added some die cut pine boughs, some ribbon, a couple of jingle bells and some red enamel dots.  

I just love how this turned out.  The perfect addition to a holiday gift!  


Card Details:

Copic Colors:
Skin: E000, E00, E11, E04, R20
Beard: W0, W3
Lime Green: YG21, YG23, YG67
Brown: E35, E37
Black: C5, C7
Red: R24, R56, R59
Yellow: Y21, Y26
Trees: YG61, YG63, YG67


Saturday, November 14, 2020

Picket Fence Studios November 2020 Release!!!

 Hello!  It's time for the November Release at Picket Fence Studios!!!!  So so many amazing products being released this month!  You do not want to miss this!  

My first card features the New Bugville Clear Stamp Set and Coordinating Dies.  How fun is this!  A cute little buggy town with little bugs to go with it!  To create my card, I used my Life-Changing Blender Brushes to create a blue background with Distress Inks.  Then, I stamped out my sentiment in black ink and heat embossed it with clear embossing powder.  I stamped out my images, colored them up with Copics, and cut them out using the coordinating dies.  Then, I added a black strip of card stock to the bottom of my blue panel and drew in some white lines with a gel pen.  Using foam tape, I popped my town on top and added my bugs with liquid adhesive.  Such a fun, vibrant way to say, "hello."


My next card features fun, vibrant colors as well.  I used my Life Changing Blender Brushes again to stencil in my Daisy Burst background using some dye inks in my stash.  Then I die cut an oval from the center and turned it into a shaker using the NEW Moonshine Sequin Mix.  For the drinks, I used the NEW Drink Your Greens Clear Stamp Set and Coordinating Dies.  After coloring them up with Copics, I cut them out and arranged them in front of my shaker window.  I used liquid glue to adhere some of them and popped some of them up with foam tape.  Then I also added some colored flowers from the NEW Beautiful Girl Flowers Clear Stamp Set and Coordinating Dies.  A little encouraging sentiment finishes it off.  


For my final card, I used the NEW Slim Line Die Cutting System to create another fun and vibrant card.  First, I used the smaller die to cut a piece of light blue card stock.  Then I added some Ocean Poppy Paper Glaze to the NEW Geosquares Stencil to create my background.  I used the circle from the Slim Line Die Cutting System to cut a circle towards the top of the card and created another shaker card using the NEW Razzle Dazzle Sequins Mix.  Such a beautiful mix of colors!  Then I mounted the whole thing on top of some purple card stock cut with the largest die.  I layered on the Alice Girl Stamp just in front of my shaker.  For my sentiment, I used the NEW Literally Word Die and cut it from yellow card stock mounted on a white background.  The stamped sentiment underneath is from the NEW Drink Your Greens Stamp Set.  


Products Used:

Hope you have a great weekend!  Thanks so much for stopping by!!

Thursday, November 12, 2020

CC Designs Reindeer Swissie

Hello!  Today, I'm so excited to share another fun card using the NEW Release from CC Designs!  This little cutie is Reindeer Swissie!  Isn't she just adorable!!!  For my card, I started with some patterned papers and trimmed the polka dot pattern to fit the front of my card base.  Then I used the NEW Deco,  Square Metal Die to cut a piece of red patterned paper.  I layered on a scalloped circle in white and then added a die cut Christmas Tree from my stash and my little reindeer!  Then I mounted the whole thing on foam and added it to my card base.  Just under my image, I added a strip of red striped paper, stamped my sentiment, and adhered a couple of gingerbread stickers.  

I just love how bright and cheery this card turned out!  And that reindeer!  She is just the cutest!!!


Card Details:


Monday, November 9, 2020

CC Designs Christmas Animals Gift Enclosures

Hello!  Today, I'm sharing a couple of quick and easy gift enclosures made with the NEW CC Designs Christmas Animals Stamp Set and Happy Holidays Paper Pad.  These little 3X3 cards are so fun to make and they are the perfect size to drop into a gift bag at Christmas time!  


Project Details:


Saturday, November 7, 2020

Not 2 Shabby Shop Winter Friends and Sentiments

 Hello!  I'm back with another card featuring the NEW Release at The Not 2 Shabby Shop!  Two new mini stamp sets have been released and they are adorable!  I'm featuring both of them here on this sweet little winter card.  Winter Friends and Winter Sentiments.  

For this card, I started with my stamped image.  I colored him up using Copic markers and fussy cut him out.  Then I layered him on top of a die cut circle.  I stamped out the tree images in black in the background and layered on some snowy slopes.  Then I also stamped out a couple of snowflakes and added my fox on top with some foam tape.  I hot glued the circle to a plastic snowflake from the dollar store and added that on top of my patterned paper.  Then I stamped my sentiment across the bottom.  


Be sure to stop by the Not2Shabby Shop and check out these and all the other new goodies!  

Friday, November 6, 2020

CC Designs November 2020 Release Day!

It's Release Day at CC Designs!!  Be sure to stop by the shop and check out all the new goodies.  For my card today, I used the New Santa Claus and Mrs. Claus Clear Stamp Sets.  I colored them up with Copics, fussy cut them out and popped them on top of my card panel with foam tape.  The little gingerbread house is a Christmas Tag and the background was created with the NEW Spotty Background Die.  Such a quick and easy card, but I just love how it turned out!!!


Thursday, November 5, 2020

CC Designs November 2020 Release Preview Day #2

 Hello!  I am so excited to be featuring another new stamp from the November 2020 CC Designs Release!  This little cutie is called Elf Swissie.  I had so much fun creating with her.  I chose some fun and bright patterned papers, colored her up to match, and fussy cut her out.  Then I layered her on top of some tags, added some die cut ephemera, stamped my sentiment, and added some enamel dots.  Such a quick and easy card that really packs a punch!  


Card Details:
CC Designs Elf Swissie Clear Stamp

Wednesday, November 4, 2020

CC Designs November 2020 Release Preview Day #1

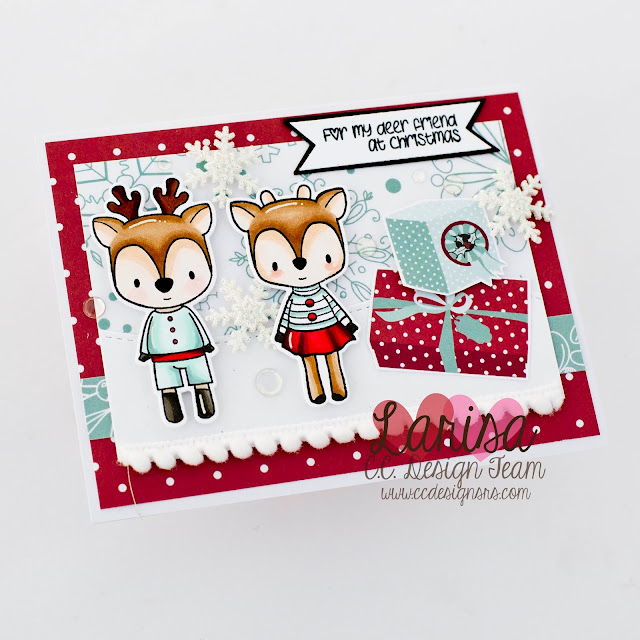
 Who's ready for the November 2020 CC Designs Release!  This month, you'll find stamps, dies, and patterned papers new to the shop!  These cute little deer are part of the NEW Christmas Animals Clear Stamp Set.  I've created a little scene card here using some of the NEW Happy Holidays Patterned Paper!  I fussy cut some of the presents from one of the papers, added them to my scene and trimmed the bottom with some white pom pom trim.  Then I stamped out my sentiment and added some 3D snowflakes.  So much fun!  


Card Details:
Christmas Animals Clear Stamp Set
Christmas Animals Outline Die
Happy Holidays Patterned Papers


Picket Fence Studios Hello Lovely Slim Line


Hello!  Or should I say, "Hello, Lovely!"  I hope you are having a fabulous week!  Today, I am sharing a pretty slim line card featuring the NEW Slim Line Die Cutting System!  As you've probably already heard, this Die Cutting System is so easy to use and offers endless possibilities!  For my card, I paired it with some patterned paper and Beautiful Girl Karen!  


First, I die cut the smaller rectangle from some plaid patterned paper.  Then I layered that on top of some white card stock die cut with the larger rectangle.  This created the base panel for my card.  Then I used the tree square from the set and die cut that from some white card stock.  I trimmed around the edges to create a white border and then layered that onto some black card stock and trimmed again.  Then I adhered it to the top of my card panel.  I stamped, colored, and die cut my image and popped her in the center of the frame using foam tape.  Then I die cut and layered up my "lovely" sentiment.  I adhered that just below my image.  The "hello" sentiment is from the Dragon Fruit stamp set.  I heat embossed that in white and trimmed it into a rectangle.  Then I added it just over the bottom of my "lovely" sentiment.  A few Gin and Tonic Sequins finish this card off!  I just love how it turned out and it was so easy to create!  
Products Used:


Tuesday, November 3, 2020

Not 2 Shabby Shop NEW Release!!!!

Hello!  Have you seen the new Release at The Not 2 Shabby Shop?  Two new mini stamp sets have been released and they are adorable!  I'm featuring both of them here on this sweet little winter card.  Winter Friends and Winter Sentiments.  

To create my card, I started with a piece of white card stock for my panel.  Then I stitched on a strip of blue patterned paper across the bottom.  I grabbed some splatter stamps from my stash and stamped one of them in blue.  Then I stamped out my trees, snow flakes, and pink snow from the Not2Shabby Sets. I folded a strip of pink and tan patterned paper and stitched across the middle to create a little paper ribbon.  Then I stamped my sentiment, added a glittered snowflake, and finished it off with the little bunny.  I colored her up with Copics, fussy cut her out, and added the little hot cocoa mug to her hands.  


Monday, November 2, 2020

La-La Land Crafts 3D Harvest

Hello!  This week's theme at La-La Land Crafts is 3D Harvest.  I decided to make a mini tag flip album for my project!  First, I die cut 5 pieces of chipboard into large tags.  Then I backed each side with patterned paper or card stock.  I decorated both sides with die cuts, scalloped frames, etc.  On the front, I created a little fall scene and attached them all together with a metal ring.  Then I tied on some ribbons and there you have it.  One sweet little tag flip album!  


Card Details:
Happy Boo To You Clear Stamp Set: https://www.lalalandcrafts.com/Happy-Boo-to-You-Clear-Stamp-Set-_p_927.html
Large Stitched Tags Die: https://www.lalalandcrafts.com/Large-Stitched-Tags-Die_p_953.html
Christmas Hodgepodge Paper Pack: https://www.lalalandcrafts.com/Christmas-Hodgepodge-Paper-Pack_p_1112.html
Double Stitched Rectangles Die: https://www.lalalandcrafts.com/Double-Stitched-Rectangles-Die_p_2323.html
Scalloped Rectangles Die: https://www.lalalandcrafts.com/Scalloped-Rectangles-Die_p_884.html
Halloween House Add-On Die: https://www.lalalandcrafts.com/Halloween-House-Add-On-Die_p_937.html
Leaves Confetti Die: https://www.lalalandcrafts.com/Leaves-Confetti-Die_p_933.html
Filigree Leaves Die: https://www.lalalandcrafts.com/Filigree-Leaves-Die_p_932.html
Broken Fence Die: https://www.lalalandcrafts.com/Broken-Fence-Die_p_531.html
Mushroom and Grass Border Die: https://www.lalalandcrafts.com/Mushroom-and-Grass-Border-Die-_p_1031.html

Copic Colors:
Skin: E000, E00, E11, E04, R20
Hair: E43, E47, E49
Orange: YR04, YR15, YR27
Green: YG21, YG25, YG67